This page shows you how to connect to your CockroachCloud cluster.
Step 1. Authorize your network
CockroachCloud requires you to authorize the networks that can access the cluster to prevent denial-of-service and brute force password attacks:
- In a development environment, you need to authorize your application server’s network and your local machine’s network. If you change your location, you need to authorize the new location’s network, or else the connection from that network will be rejected.
- In a production environment, you need to authorize your application server’s network.
- If you have a GCP cluster, you can set up and authorize a VPC peered network.
- If you have an AWS cluster, you can set up an AWS PrivateLink connection.
Add IP addresses to the allowlist
Navigate to your cluster's Networking > IP Allowlist tab.
The IP Allowlist tab displays a list of authorized networks (i.e., an IP network allowlist) that can access the cluster.
Check if the current network has been authorized. If not, proceed with the following steps.
Click the Add Network button.
The Add Network dialog displays.
(Optional) Enter a Network name.
From the Network dropdown, select:
- New Network to authorize your local machine's network or application server's network. Enter the public IPv4 address of the machine in the Network field.
- Current Network to auto-populate your local machine's IP address.
- Public (Insecure) to allow all networks, use
0.0.0.0/0. Use this with caution as your cluster will be vulnerable to denial-of-service and brute force password attacks.
Note:IPv6 addresses are currently not supported.
To add a range of IP addresses, use the CIDR (Classless Inter-Domain Routing) notation. The CIDR notation is constructed from an IP address (e.g.,
192.168.15.161), a slash (/), and a number (e.g.,32). The number is the count of leading 1-bits in the network identifier. In the example above, the IP address is 32-bits and the number is32, so the full IP address is also the network identifier. For more information, see Digital Ocean's Understanding IP Addresses, Subnets, and CIDR Notation for Networking.Select whether the network can connect to the cluster's DB Console to monitor the cluster, CockroachDB Client to access databases, or both.
The DB Console is where you can observe your cluster's health and performance. For more information, see DB Console Overview.
Click Apply.
Establish VPC Peering or AWS PrivateLink
VPC peering is only available for GCP clusters, and AWS PrivateLink is only available for AWS clusters.
- Navigate to your cluster's Networking > VPC Peering tab.
- Click Set up a VPC peering connection.
- On the Request a VPC peering connection modal, enter your GCP Project ID.
- Enter your GCP VPC network name.
- In the Connection name field, enter a descriptive name for the VPC connection.
- Click Request Connection.
- Run the command displayed on the Accept VPC peering connection request window using Google Cloud Shell or using the gcloud command-line tool.
- On the Networking page, verify the connection status is Active.
- Navigate to your cluster's Networking > PrivateLink tab.
- Click Set up a PrivateLink connection.
- If you have a multi-region cluster, select the region to create a connection in. Skip this step if you have a single-region cluster.
- Use the Service Name provided in the dialog to create an AWS endpoint in the AWS console.
- Click Next.
- Paste the Endpoint ID you created into the VPC Endpoint ID field.
- Click Verify to verify the ID.
- Click Next to continue to the third step.
- Return to the AWS console to enable private DNS.
- Click Complete.
- On the Networking page, verify the connection status is Available.
Step 2. Create a SQL user
Only Console Admins can create SQL users. If you are a Developer, you need to ask your Console Admin for the credentials of a SQL user to access the cluster. To find out who's your Console Admin, log in and navigate to Cluster Overview > Access.
Navigate to your cluster's SQL Users page.
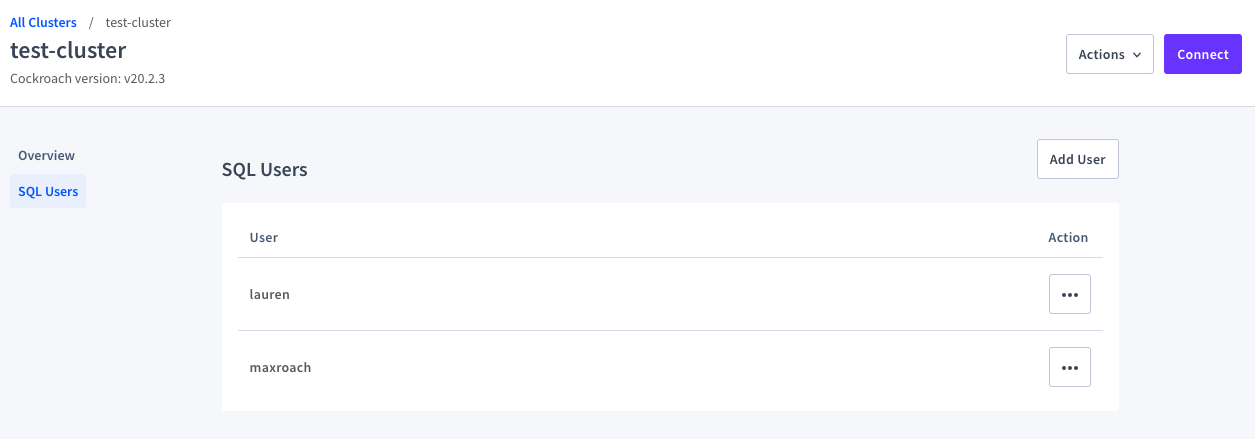
Click the Add User button in the top right corner.
The Add User dialog displays.
Enter a Username and Password.
Click Save.
Currently, all new users are created with full privileges. For more information and to change the default settings, see Granting privileges and Using roles.
Step 3. Select a connection method
In the top right corner of the Console, click the Connect button.
The Connect dialog displays with IP Allowlist selected by default.
Select a Network Security option:
You can use the IP Allowlist option if you have already added an IP address to your allowlist.
For AWS clusters, you can select AWS PrivateLink if you have already established a PrivateLink connection.
For GCP clusters, you can select VPC Peering if you have already:
From the User dropdown, select the SQL user you created in Step 2. Create a SQL user.
From the Region dropdown, select the region closest to where your client or application is running.
From the Database dropdown, select the database you want to connect to.
The default database is
defaultdb. For more information, see Default databases.Click Next.
Select a connection method (the instructions below will adjust accordingly):
Step 4. Connect to your cluster
To connect to your cluster with the built-in SQL client:
Click the name of the
<cluster_name>-ca.crtto download the CA certificate to your local machine.Alternatively, you can set
sslmode=require. This is less secure than using a CA certificate and should not be used with sensitive data.Create a
certsdirectory on your local machine:$ mkdir certsMove the downloaded
<cluster_name>-ca.crtfile to thecertsdirectory:$ mv /path/to/cc-ca.crt /path/to/certsFor example:
$ mv /Users/maxroach/Downloads/<cluster_name>-ca.crt /Users/maxroach/certsIf you have not done so already, install the CockroachDB binary.
Copy the
cockroach sqlcommand and connection string provided in the Console, which will be used in the next step (and to connect to your cluster in the future).In your terminal, enter the copied
cockroach sqlcommand and connection string to start the built-in SQL client.Be sure to replace the
<your_certs_ directory>placeholder with the path to thecertsdirectory you created earlier.Enter the SQL user's password and hit enter.
Note:If you forget your SQL user's password, a Console Admin can change the password on the SQL Users page.
You are now connected to the built-in SQL client, and can now run CockroachDB SQL statements.
To connect to your cluster with your application, use the connection string provided in the Console:
- Click the name of the
<cluster_name>-ca.crtto download the CA certificate to your local machine. Create a
certsdirectory on your local machine:$ mkdir certsMove the downloaded
<cluster_name>-ca.crtfile to thecertsdirectory:$ mv /path/to/cc-ca.crt /path/to/certsFor example:
$ mv /Users/maxroach/Downloads/<cluster_name>-ca.crt /Users/maxroach/certsCopy the connection string provided in the Console, which will be used to connect your application to CockroachCloud.
Add your copied connection string to your application code.
Be sure to replace the
<your_certs_ directory>placeholder with the path to thecertsdirectory you created earlier.Note:If you forget your SQL user's password, a Console Admin can change the password on the SQL Users page.
For examples, see the following:
To connect to your cluster with a CockroachDB-compatible tool, use the connection parameters provided in the Console.